目前,人工智能应用程序的构建和部署方式正在发生根本性转变。人工智能应用越来越复杂,并应用于更广泛的用例。这需要端到端的人工智能生命周期管理,从数据准备到模型开发和培训,再到人工智能应用程序的部署和管理。这种方法可以降低前期成本,提高可扩展性,并降低客户使用 AI 应用程序的风险。
虽然云原生的应用程序开发方法对开发人员很有吸引力,但机器学习( ML )项目是出了名的时间密集型和成本密集型项目,因为它们需要一个拥有多种技能的团队来构建和维护。
这篇文章解释了如何使用 NVIDIA TAO Toolkit 加速视觉 AI 模型开发,并将其部署到 NVIDIA Triton Inference Server 中进行推理,所有这些都在 Azure 机器学习( Azure ML )平台上。
NVIDIA Triton 推理服务器是一款开源推理服务软件,帮助标准化模型部署和执行,并在生产中提供快速和可扩展的 AI 。
Azure ML 是一种用于加速和管理机器学习项目生命周期的云服务,使开发人员能够自动化人工智能工作流,从数据准备、模型培训到模型部署。开发人员可以使用 Azure ML 轻松地大规模培训、部署和管理 AI 模型。
观看下面的视频,了解如何使用 NVIDIA TAO 工具包微调您的模型,并在 Azure ML 上使用 NVIDIA Triton 推理服务器部署它们进行推理的完整演练。
视频 1 。在 Azure 机器学习上使用 NVIDIA TAO 工具包创建和部署自定义 AI 模型
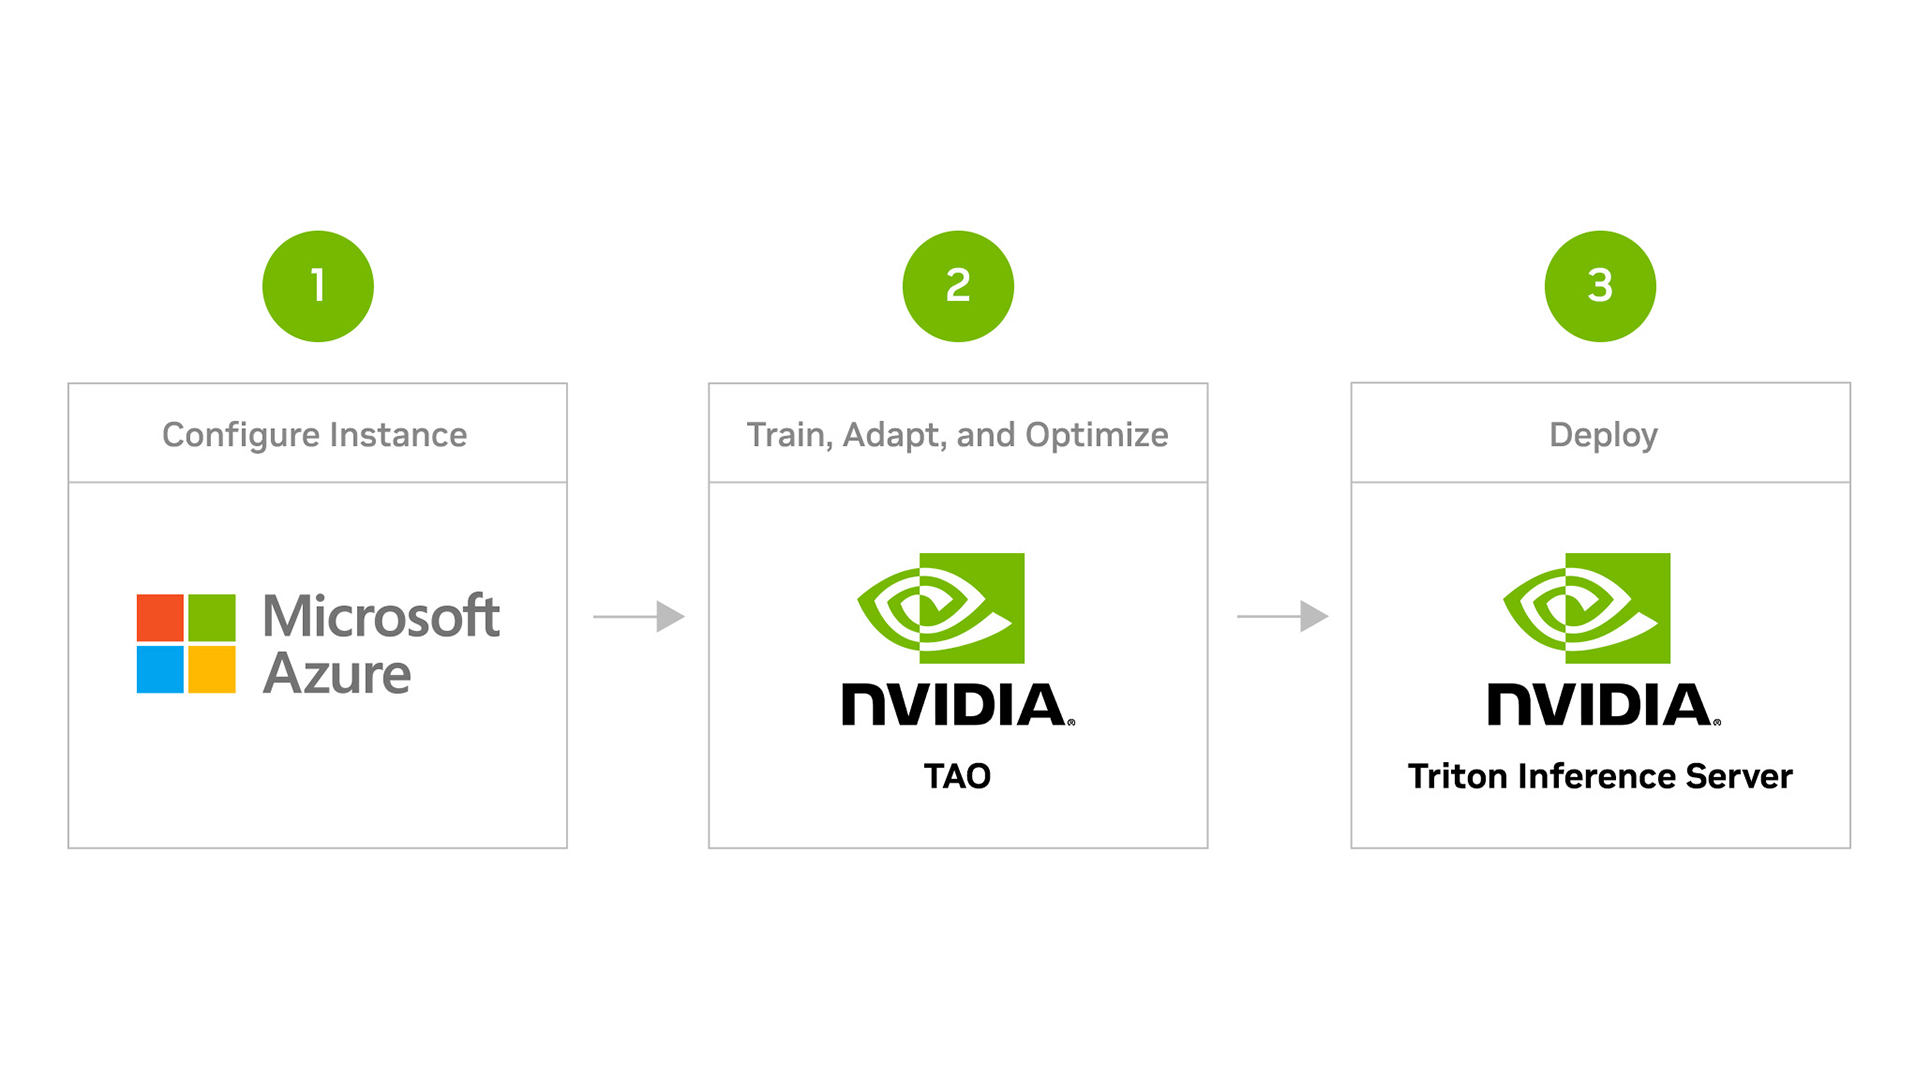
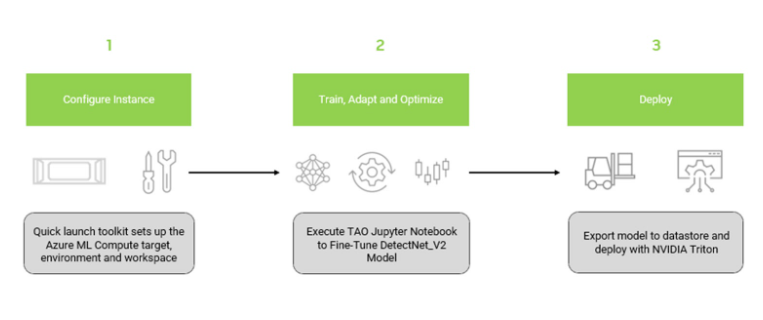
整个工作流程包括三个主要步骤:
- 安装 NGC Azure ML 快速启动工具包
- 训练和优化预训练的对象检测模型
- 使用 NVIDIA Triton 推理服务器在 Azure ML 上部署优化模型
本节介绍安装 NGC 快速启动工具包所需的步骤,该工具包配置 Azure ML 资源并上载必要的容器和模型以供培训。所需的配置文件在 NVIDIA NGC Catalog 上的 AzureML Quick Launch – TAO 资源上提供。
使用以下代码创建 conda 环境以安装 Azure ML 快速启动工具包,以避免与计算机中的现有库发生任何可能的冲突:
conda create -n azureml-ngc-tools python=3.8
conda activate azureml-ngc-tools
使用以下代码安装 Azure ML 快速启动工具包:
pip install azureml-ngc-tools从 AzureML Quick Launch: TAO 下载资源:
wget --content-disposition https://api.ngc.nvidia.com/v2/resources/nvidia/tao_detectnet_aml/versions/version1/zip -O azureml_quick_launch_tao_1.zip文件内容
azure_config.json文件包含与需要更新的用户凭据、 Azure 工作区和 GPU 计算资源有关的详细信息。使用 Azure 订阅 ID 、资源组和工作区名称编辑azureml_user部分。接下来,用 GPU 集群详细信息编辑aml_compute部分。- 推荐的虚拟机: NCsv3 、 NDv2 或 NC A100 v4 或 ND A100 v4 系列
- 操作系统: Ubuntu 20.04
- 要了解有关 Azure VM 的更多信息,请参阅 Virtual Machine series 。要了解如何启动 Azure VM 实例,请参阅 Azure documentation 。
ngc_config.json文件包含 NGC 目录中的内容,例如 Docker 容器和 Jupyter 笔记本,您可以将其上载到 Azure 机器学习资源中。
- 打包了几个脚本,将用于模型部署。
- 使用以下代码运行工具包:
azureml-ngc-tools --login azure_config.json --app ngc_config.json这将将所有资源上载到 Azure ML 数据存储。上传后,会为 Jupyter 会话生成一个 URL ,使您能够从本地 web 浏览器与会话交互。您可以验证所有资源都已上载到 Azure ML 门户中。上面的视频中提供了检查 Azure ML 门户中资源的步骤。
使用 NVIDIA TAO 工具包训练和优化对象检测模型
本节介绍在 Azure ML 平台上使用 NVIDIA TAO 工具包培训模型的步骤。
在开始培训过程之前,您需要运行名为CopyData.ipynb的辅助笔记本。笔记本电脑由azureml-ngc-tools自动生成。这会将笔记本从数据存储区复制到计算集群。
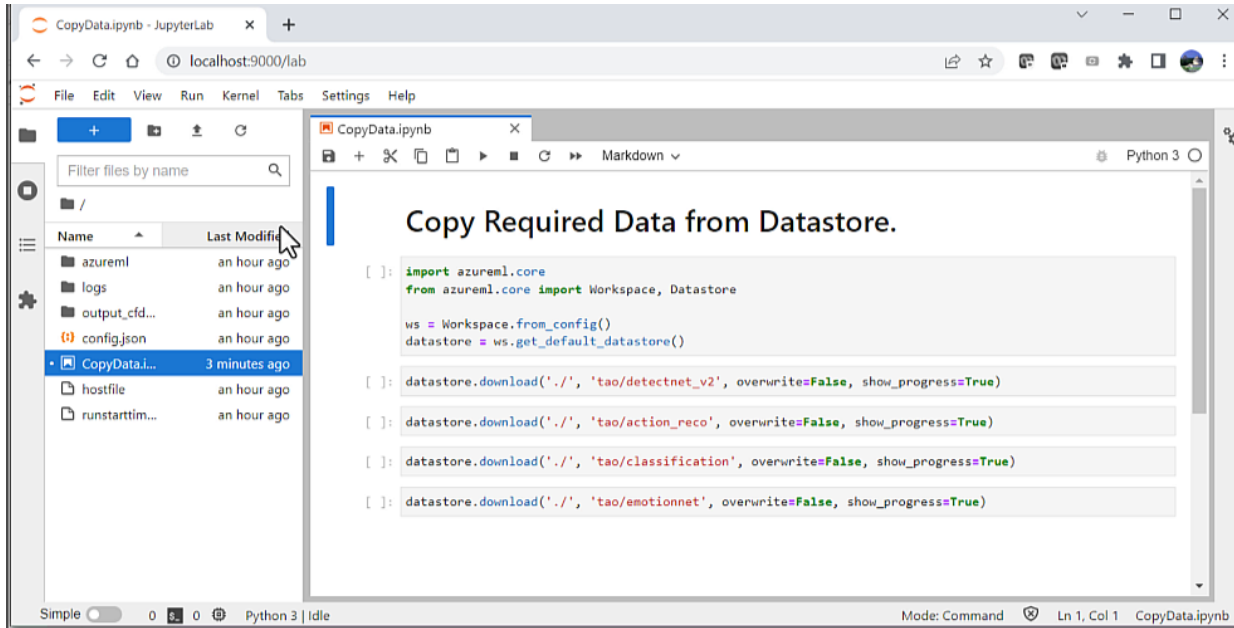
CopyData.ipynb用于将笔记本从数据存储复制到计算集群的 Jupyter 笔记本将创建一个名为tao的新文件夹,其中包含提供的所有附加数据。此文件夹包含 Jupyter 笔记本以及培训所需的配置文件。导航到文件夹tao/detectnet_V2下的TAO_detectnet_v2.ipynb笔记本。DetectNet_v2是可用于培训的众多计算机视觉笔记本之一。
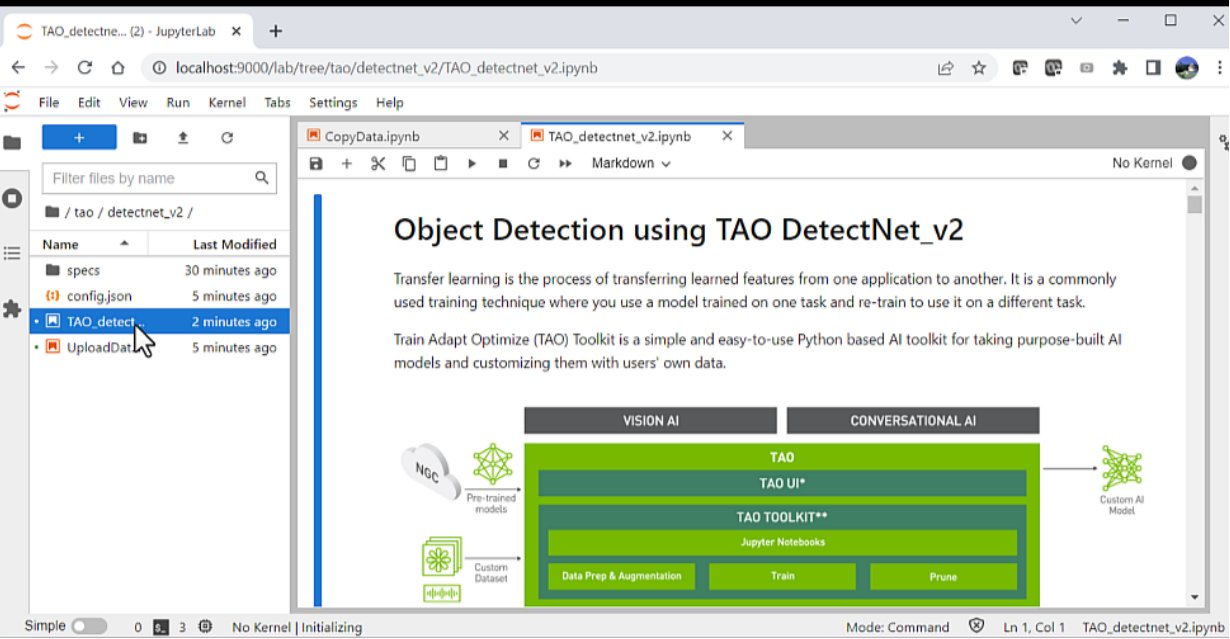
TAO DetectNet_v2用于训练模型的 Jupyter 笔记本加载笔记本后,只需执行显示的每个单元格。有关此网络或如何配置超参数的更多信息,请参阅 TAO Toolkit documentation 。笔记本中包含的一些主要步骤包括:
- 设置环境变量
- 下载和转换培训数据
- 从 NGC 目录下载模型
- 培训模型
- 修剪模型以删除不需要的图层并减小模型大小
- 重新修剪模型以恢复丢失的精度
- 量化感知训练( QAT ),将模型的精度更改为 INT8 ,在不牺牲精度的情况下减小模型大小
- 导出模型以进行推断
在计算集群上生成模型后,您需要将模型上载到 Azure ML 工作区。要上传,请运行UploadData.ipnyb笔记本将模型复制到数据存储。此模型将用于部署。
使用 NVIDIA Triton 推理服务器部署模型
接下来,使用 NVIDIA Triton 推理服务器部署导出的模型。使用 NVIDIA TAO 工具包在上一步骤中训练的模型,并将其存储在数据存储中。直接从数据存储中提取模型。
上传模型后,将 NVIDIA Triton 容器推送到 Azure 容器注册表( ACR ),创建推断终点,并使用一些示例图像对其进行测试。
注册模型进行推断
接下来的步骤需要上传模型进行推断。从数据存储中上载经过训练的模型。导航到 Azure Machine Learning Studio 以加载本地模型。
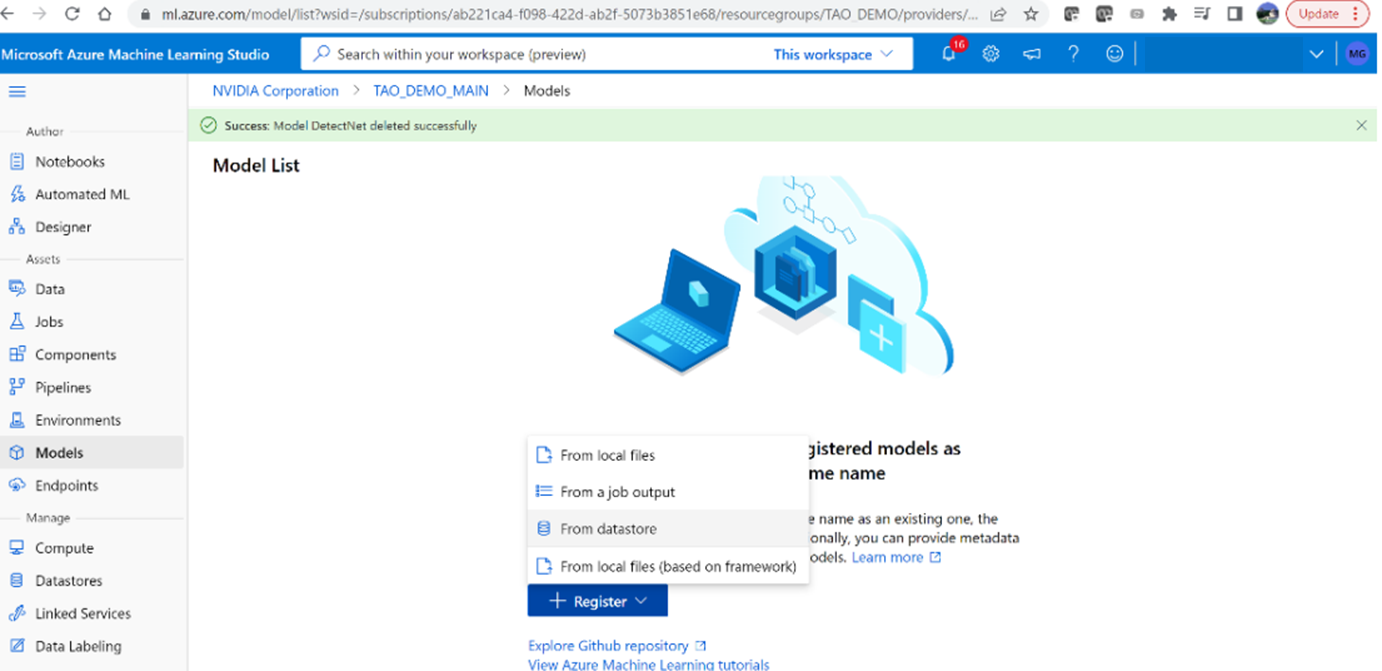
1.登录后,使用azureml-ngc-tool脚本转到 Azure ML 工作区(之前创建的)。从左侧菜单中选择“型号”,然后单击“注册”和“从数据存储”
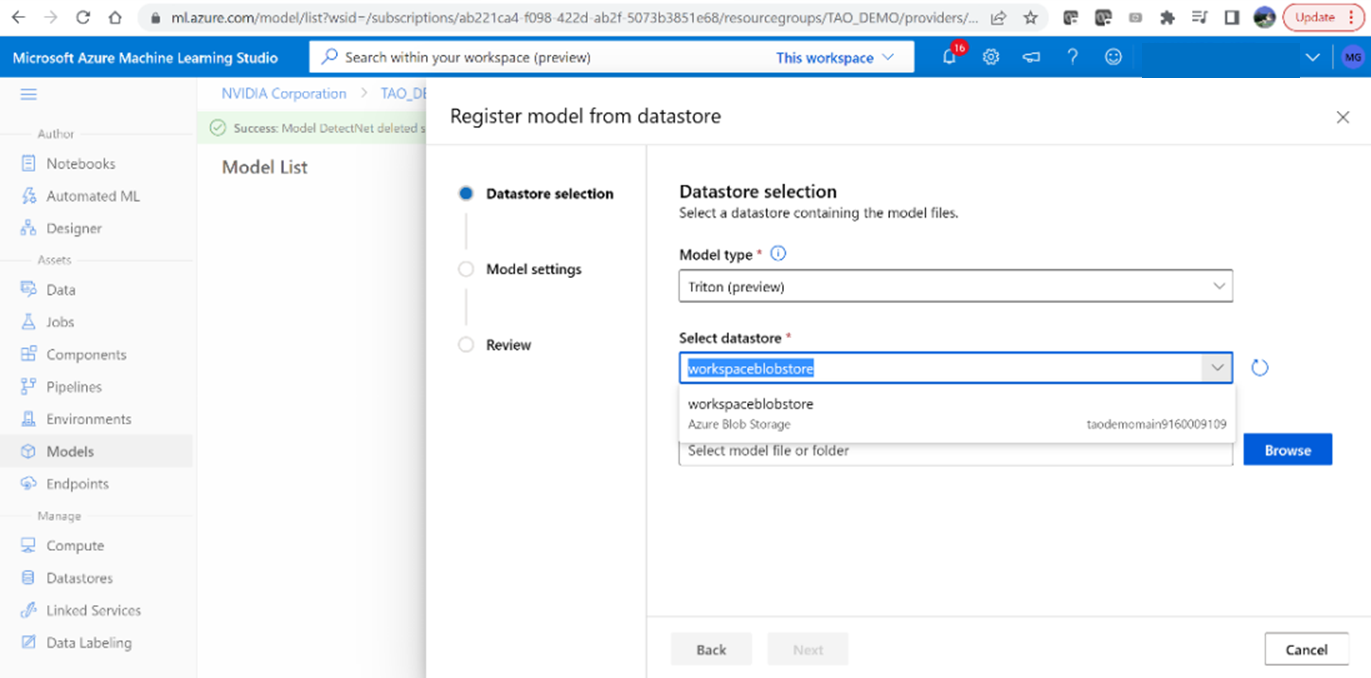
2.选择“ Triton ”模型类型以上载模型。
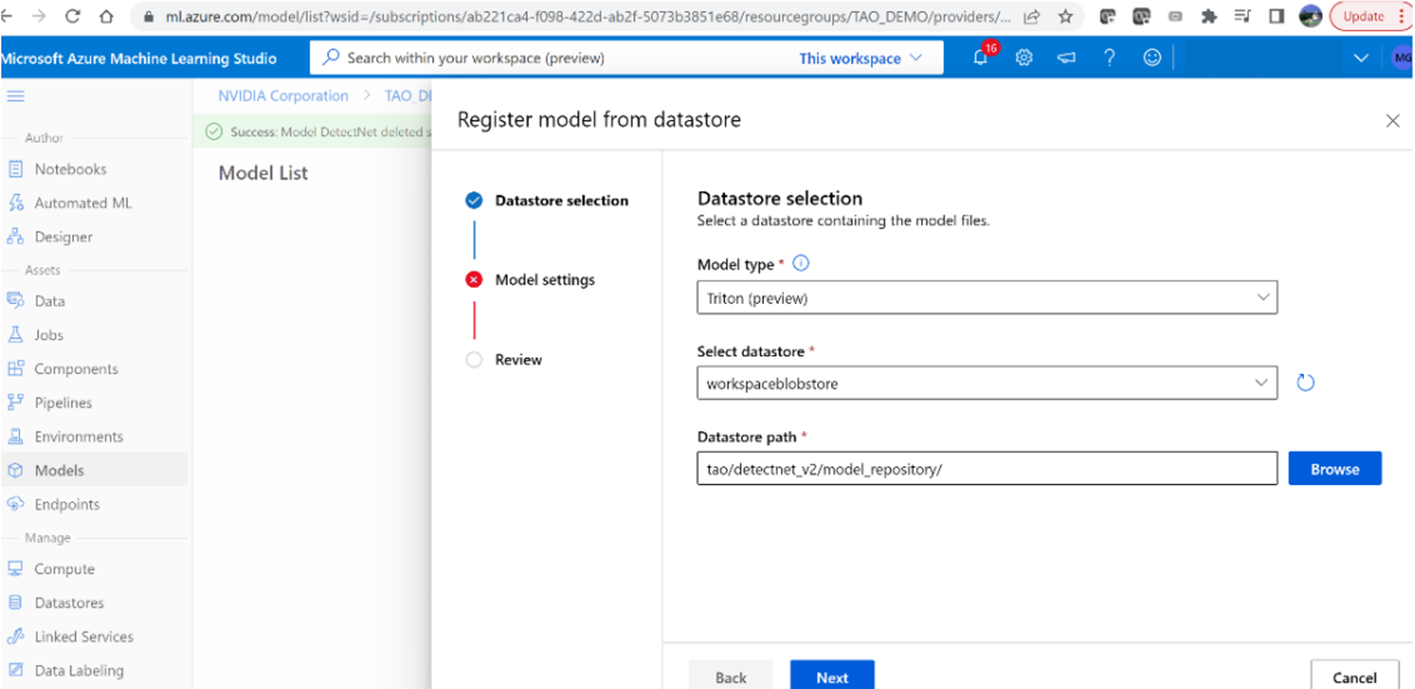
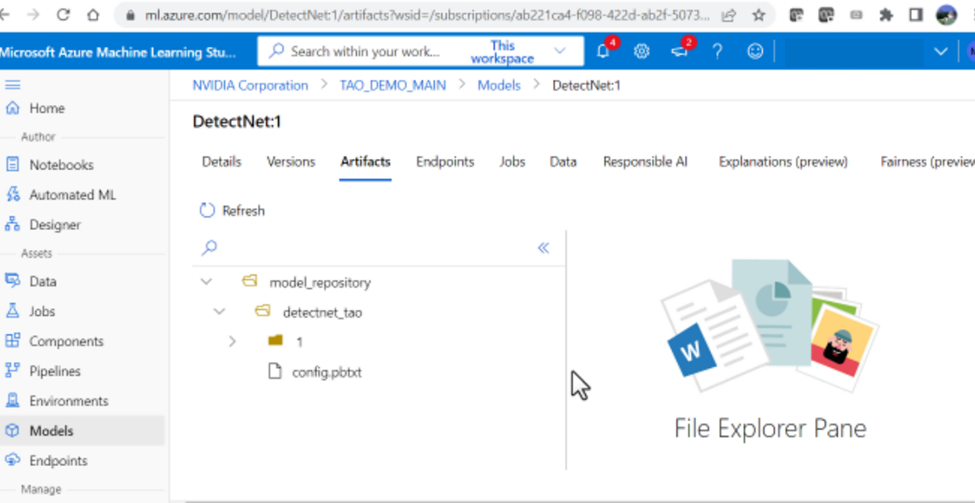
3.浏览并选择路径:tao/detectnet _v2/model _repository
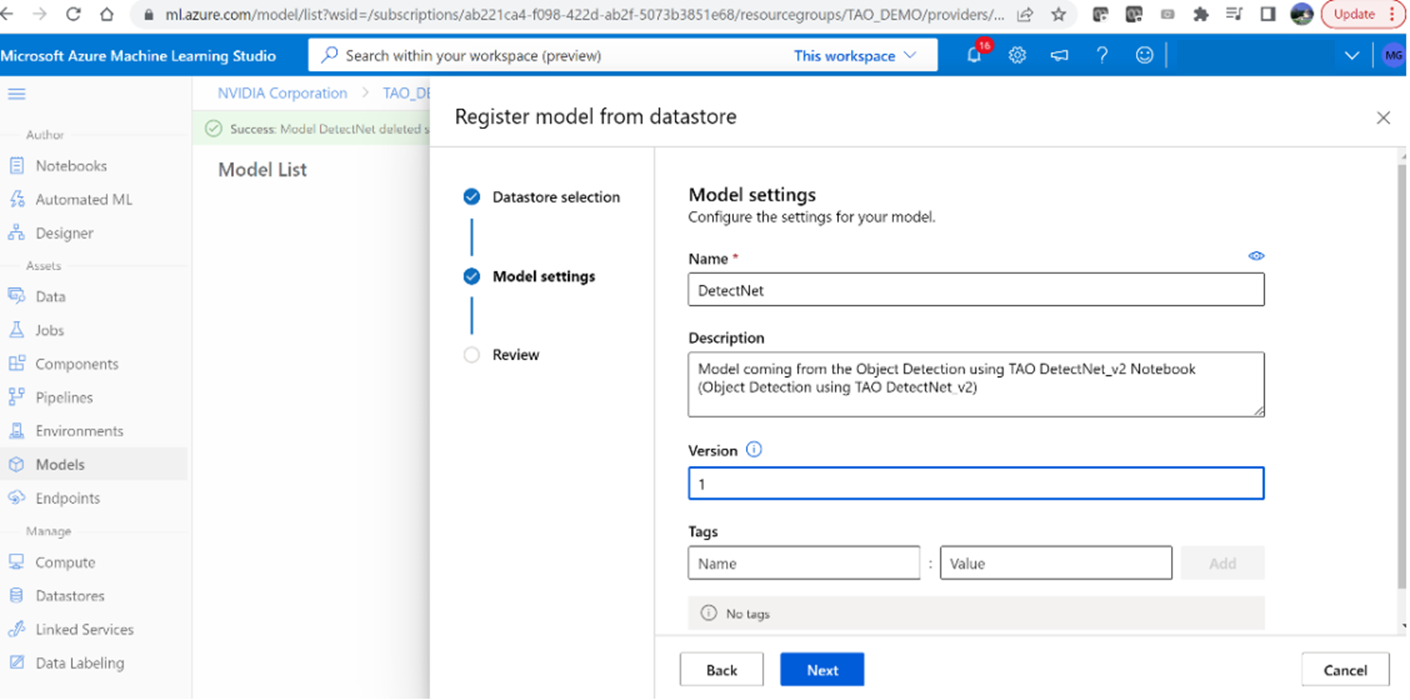
4.将模型命名为“ DetectNet ”,并将版本设置为“ 1 ”
5.模型成功上传后,您应该能够看到目录
structure.
生成 NVIDIA Triton 映像并将其上载到 Azure 容器注册表
接下来,使用必要的依赖项构建 NVIDIA Triton 容器,并将图像上载到 Azure 容器注册表( ACR )。
1.在本地计算机上,运行以下脚本以创建具有必要依赖项的 NVIDIA Triton 容器:
bash scripts/build_container.sh2.通过执行以下操作验证图像是否已在本地创建:
docker image ls如果成功,您应该看到名为nvcr.io/nvidia/tao/triton-apps的回购。
3.使用以下脚本将 Docker 图像推送到 ACR :
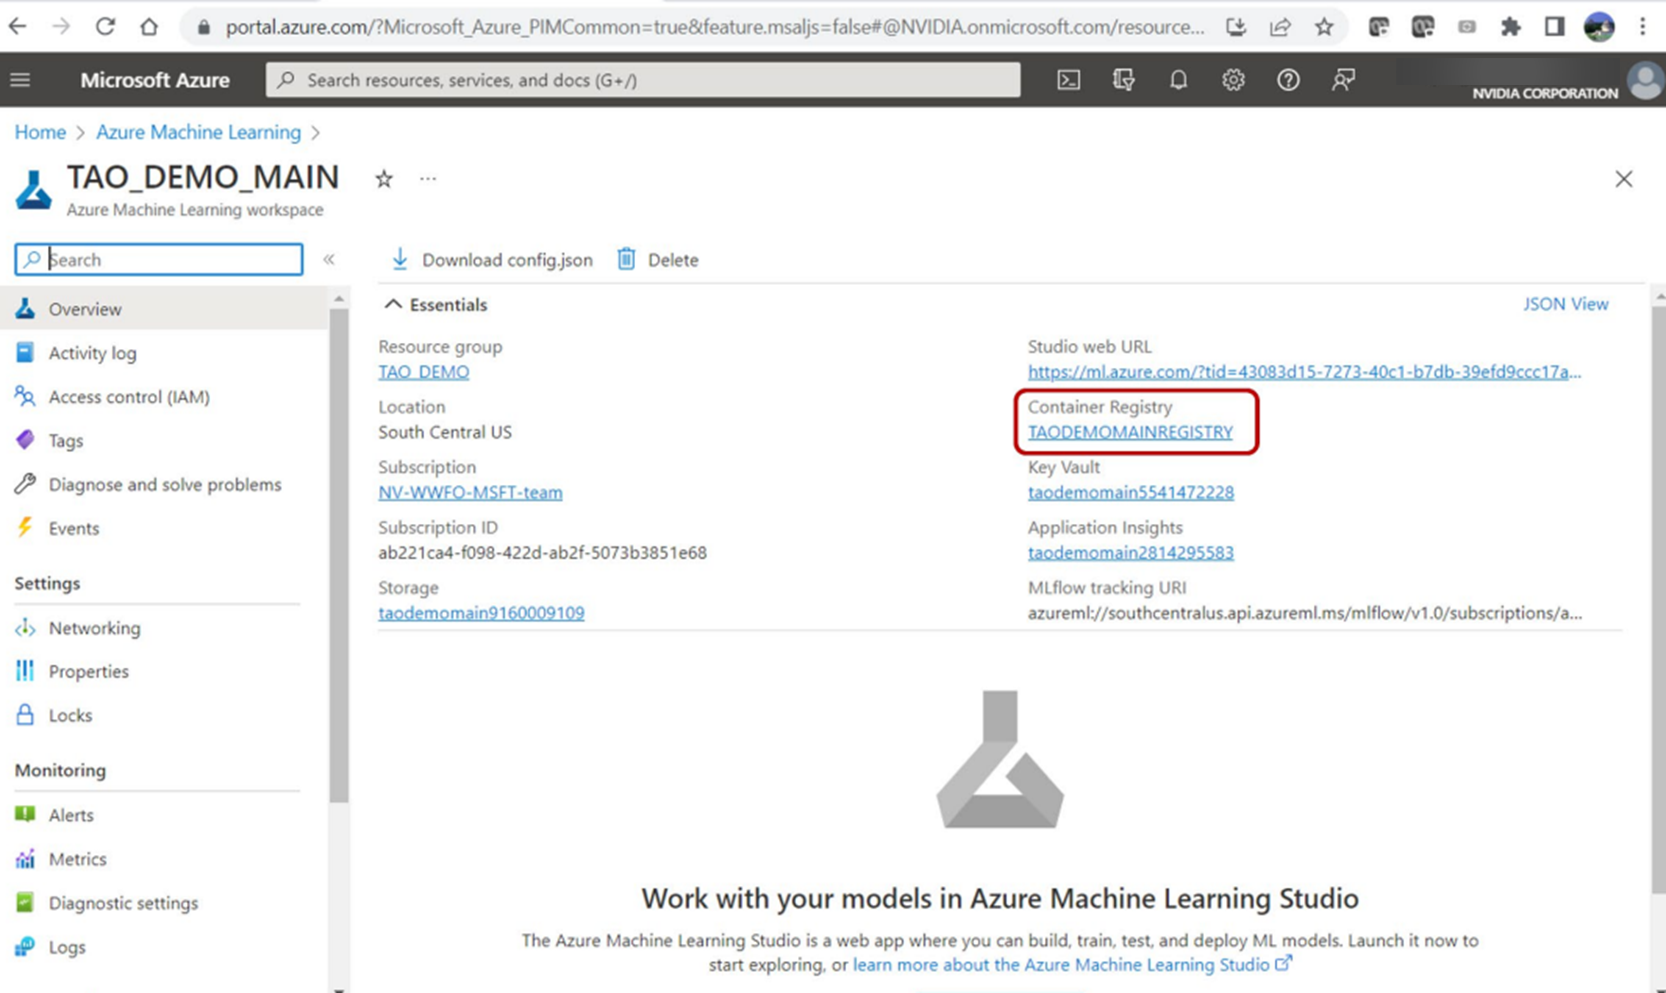
bash scripts/push_container_to_ACR.sh <registryname>registryname参数是提供的 Azure ML 工作区默认容器注册表的名称。导航到工作区基本属性仪表板,在 Azure 门户中找到它。该脚本将 Docker 图像推送到 ACR ,并将其标记为${registryname}.azurecr.io/tao:latest。
脚本完成后,导航到 ACR 以查看tao存储库中的容器。
创建 Azure ML 端点和部署
在本地计算机上,运行以下脚本以创建 Azure ML Endpoint ,然后进行部署:
bash scripts/create_endpoint _and_deployment.sh <registryname>该脚本将使用endpoint_aml.yml文件中提供的端点名称创建 Azure ML 端点。然后,它使用deployment_aml.yml文件在 Azure 上部署 NVIDIA Triton 服务。
在此文件中,您可以指定 VM 大小。在本例中,使用Standard_NC6s_v3 VM 。scripts/auxiliary_files中提供了这些文件。
脚本执行完成后,您应该能够在 Azure 门户上看到部署信息、 REST 端点和身份验证密钥。通过单击端点并导航到部署日志选项卡,可以找到部署信息。
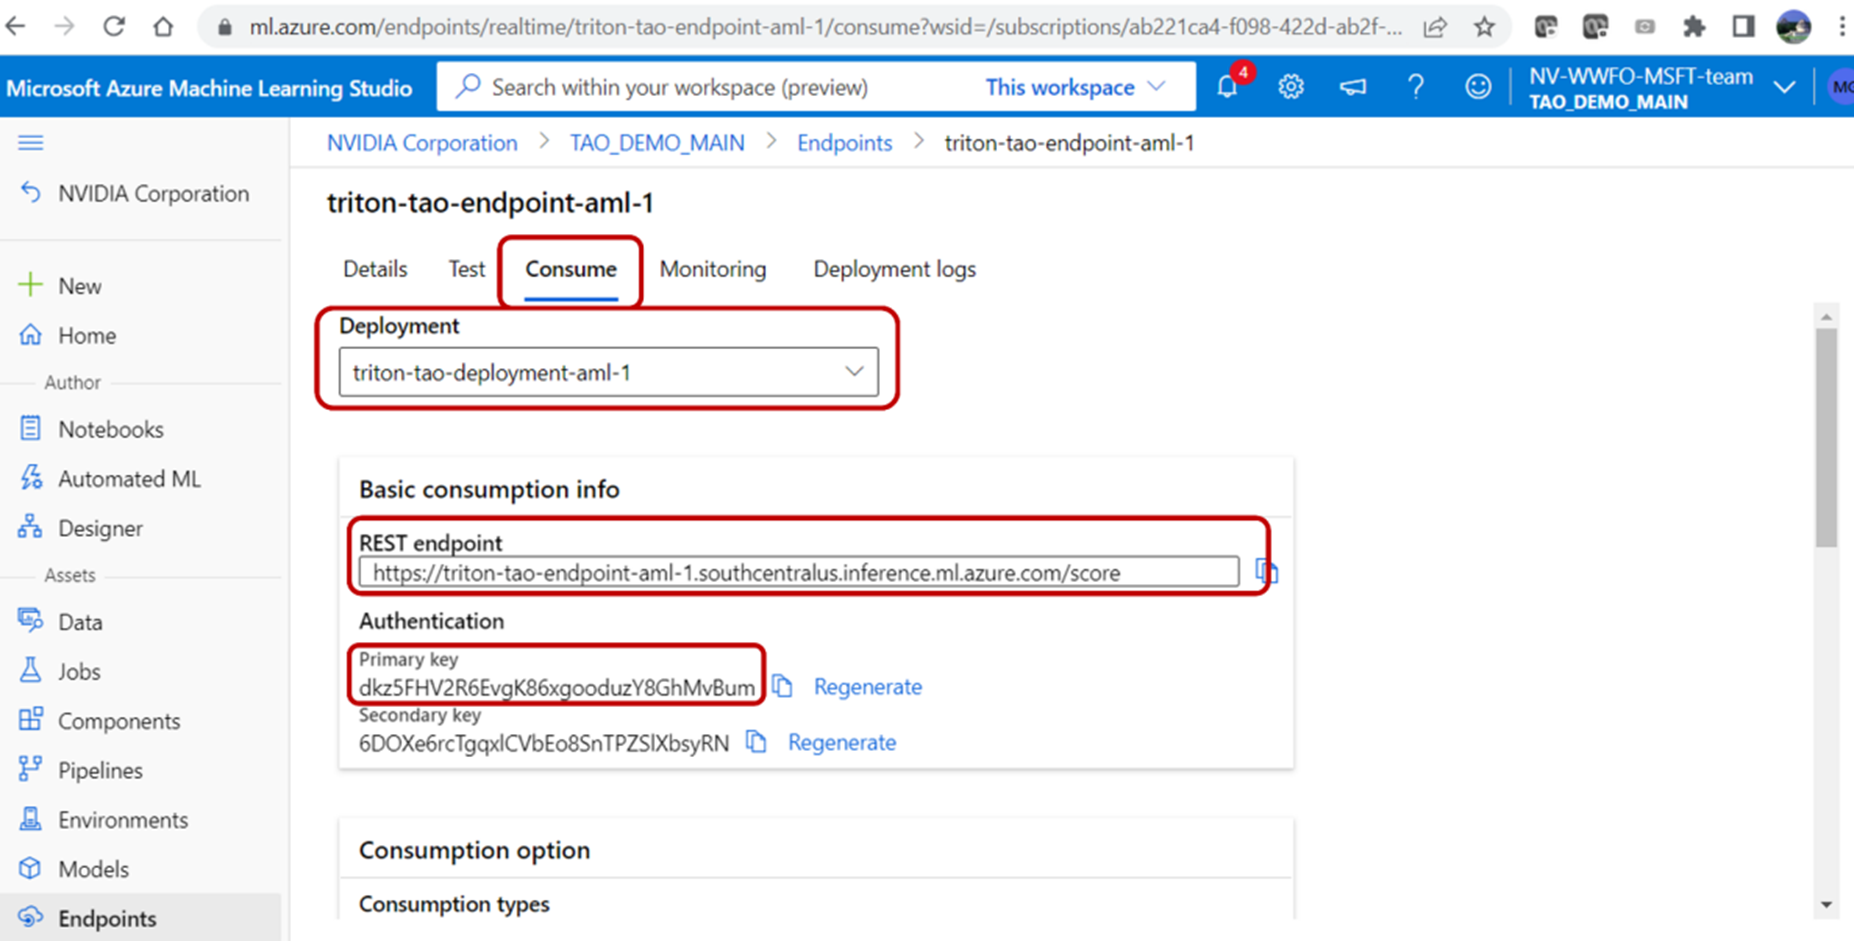
验证终结点
您可以使用 REST 端点 URL 和在 Azure 门户的“端点”选项卡下找到的主键来验证端点。若要从用户本地计算机查询 Azure ML 端点,请运行以下脚本:
bash scripts/infer.sh <REST API endpoint> <Primary key> <input image> <output path>该脚本在第一步中从 AzureML Quick Launch : TAO 获取的 zip 文件中提供。
接下来,从 NVIDIA Triton 部署端点提供 REST 端点 URL 。使用<input_image>选项提供的测试图像查询端点。带有边界框的输出图像存储在<output path>中。
总结
这篇文章展示了使用 NVIDIA TAO 工具包微调模型以及使用 NVIDIA Triton 推理服务器部署经过训练的对象检测模型的端到端工作流,所有这些都在 Azure 机器学习上。这些工具消除了人工智能框架的复杂性,使您能够在生产中构建和部署人工智能应用程序,而无需人工智能专业知识。